MyFreeCopyright.com Registered & Protected

May 31, 2011

Happy Birthday!


Wow cant believe May is getting so close to being over!! School is almost out, flowers are popping out of the ground, the trees are green-ing out, the sun has been spending quite a bit of time with us and camping fun is about to start! Usually our first trip of the year is Memorial weekend. I love, love, love camping. My mom used to take us camping all the time when I was growing up and its something I love to do with my kids! This week was our Memorial Day/Patriotic challenge.

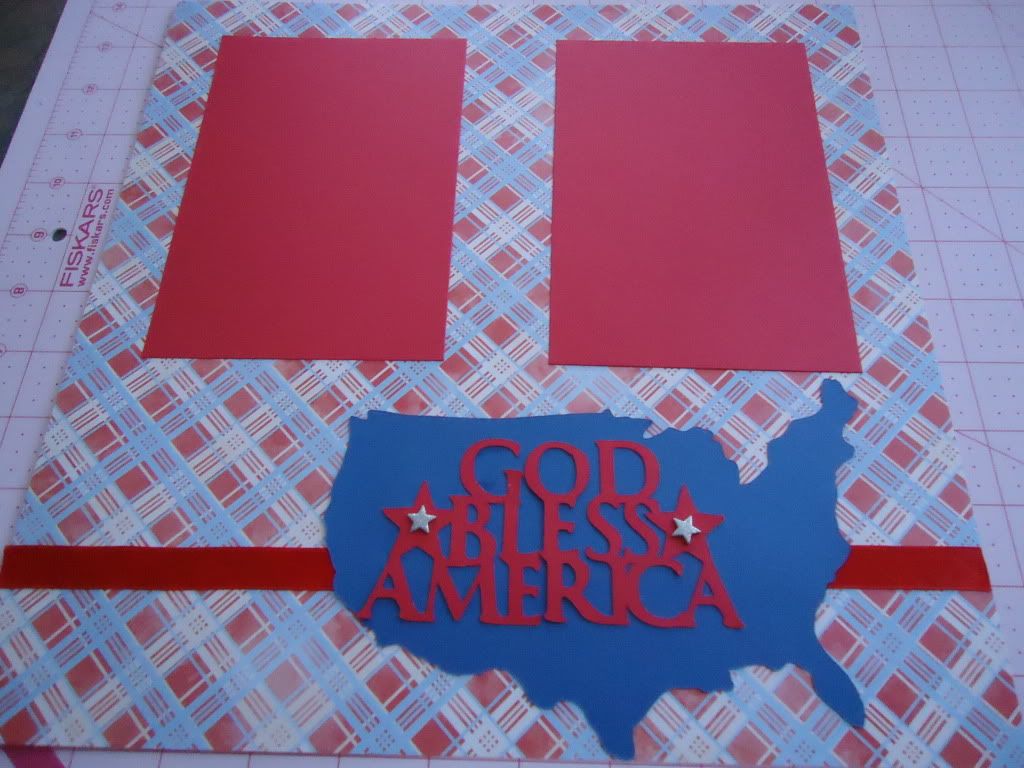
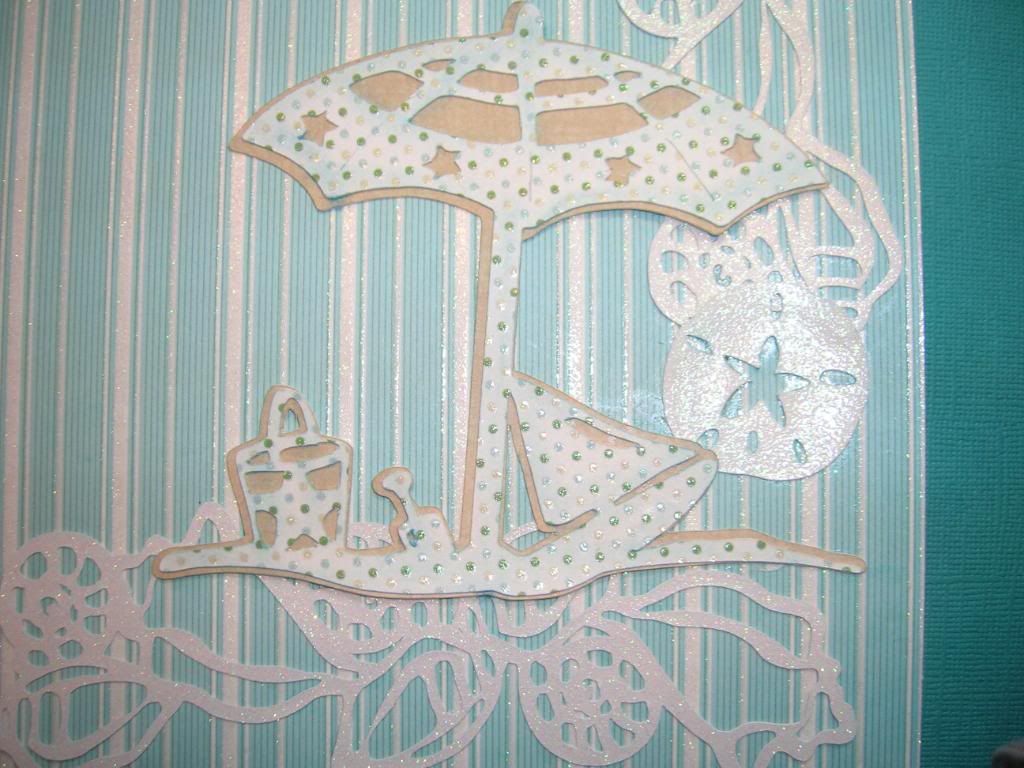
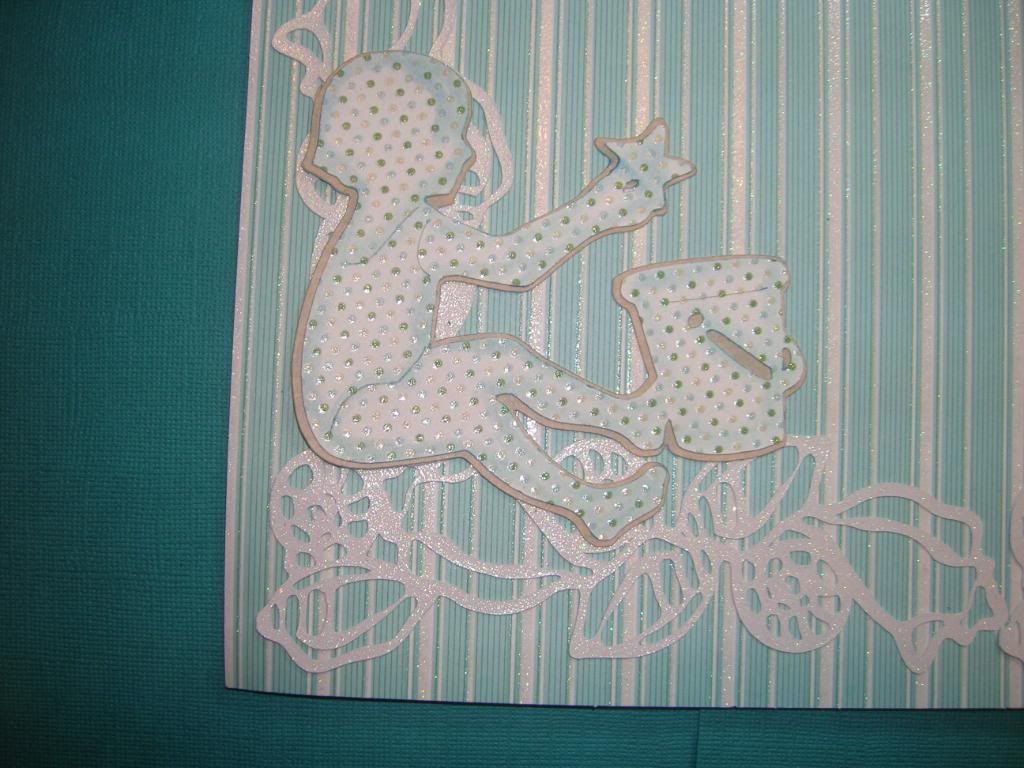
I knew right away what I wanted to do. My step-mom's birthday is the 4th of July and she loves decorating with red, white and blue. So I made her a birthday card! I was able to stop into JoAnns this week while E was at baseball practice and I picked up my very first 2 bottles of Shimmer Spritz. I couldnt wait to try them out on this card. I used the 'sparkle' spray on the stars to give them an extra shine. This is also the first time I have used my Sizzix embosser for a DT project. Dont get me wrong I find every reason to pull it out and use it on my stuff, but first time for a DT card. Hope you all have a great extended weekend and enjoy your Memorial Day!
~*Jen*~


~*Recipe*~
~*Red, white and blue cardstocks
~*Red, blue and black ink
~*Sizzix Texture Boutique embosser
~*Cuttlebug swirls embossing folder
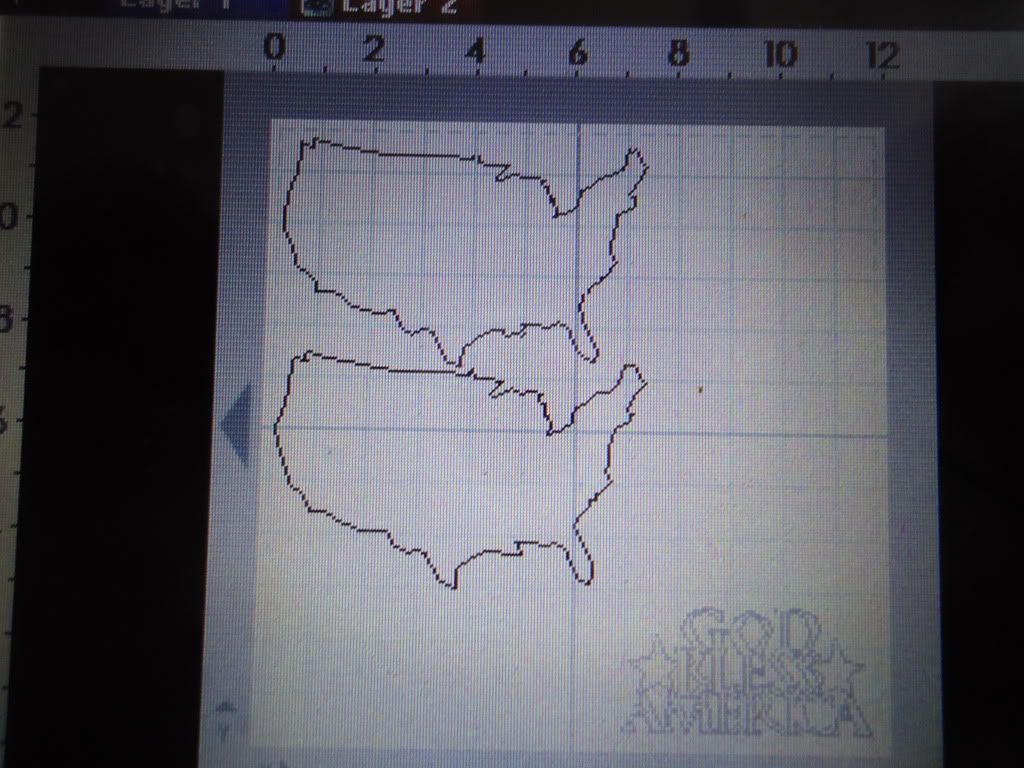
~*George and Basics Cricut cartridge
~*'Sparkle' Shimmer Spritz
~*Red bling


Did you see that you can get a Project Tote Free!*

Order Today!
Just click on the Scrap'n Easel Picture below for more information! 

*Free Project Tote With Every Scrap'n Easel Order
OFFER ENDS 5/31/11 (TODAY!)

Just click on the picture of the Scrap'n Tote below for details on current sales offers from scrap'n tote, scrap'n easel and creative options project tote!

May 30, 2011

Happy Memorial Day!

Hi Everyone,
It's Becka with Creations with Becka here. This week Sweet Sassy Diva asked her design team to come up with a Memorial Day project. For Memorial Day every year my family and friends all go to Eagle Lake, CA and camp for the whole weekend. We have had the same campsite for the last 5 years. We have a great time biking, hiking and playing games. So to show our apprecation for our freedom, I thought I would make this layout using Stand and Salute cartridge.
Here is how I set it up on the gypsy.
I used the Stand and Salute cartridge
2- 4.25x6.25 red photomats
blue cardstock
patterned paper

Did you see that you can get a Project Tote Free!*

Order Today!
Just click on the Scrap'n Easel Picture below for more information! 

*Free Project Tote With Every Scrap'n Easel Order
OFFER ENDS 5/31/11

Just click on the picture of the Scrap'n Tote below for details on current sales offers from scrap'n tote, scrap'n easel and creative options project tote!

May 29, 2011

California Dreamin'

I'm so excited to announce I've been added to the sweet sassy diva design team. It's a great honor to be a part of it. Be sure to check out all the other design team members and their blogs. I know you'll be inspired with all their work.
My first entry was a beach theme and it was a lot of fun to go back a few years and scrap some pictures from our first and only trip thus far to the beach.


 Of course I used my cricut and the Life's a Beach cartridge for all the cuts on this layout. I used my gypsy to weld the crab border together. I then inked it up all up. If you don't have the gypsy you could simply cut the border cut 3 times and glue them edge to edge. I cut it at 1 1/2 inches.
The title was cut at 2 inches and again I used my cat eye inks and brown pen to detail the cut. The sun is cut at 3".


 The sand pail was cut at 2 3/4"  I added a button on the handle for some extra pop.
I hope you enjoy my first layout and come back to see more. I have 3 more beach layouts I'll be posting this coming week.
Hugz
Tina Gale

Did you see that you can get a Project Tote Free!*

Order Today!
Just click on the Scrap'n Easel Picture below for more information! 

*Free Project Tote With Every Scrap'n Easel Order
OFFER ENDS 5/31/11

Just click on the picture of the Scrap'n Tote below for details on current sales offers from scrap'n tote, scrap'n easel and creative options project tote!

May 28, 2011

At the Beach!

My aunt absolutely loves sitting on our beach here in West Michigan, but because of the drive time she doesn't get to do it as often as she likes.  So I made this layout minus pics so that she could hang it up and remember what it is about the beach she loves.


I started with plain blue CS from DCWV and used some sand like printed paper from DCWV loose from the LSS hand torn to look like the sand hills at the lake.


I then used LIFES A BEACH Cricut Cartridge for the umbrella and chair out of white and medium blue CS from DCWV,  the chair and layer cut at 4.5 inches, umbrella and layers cut at 5 3/4 inches.  Fancy drink also cut from LAB at 1 3/4 inch with all layers at same size and cut from DCWV CS. 


Seagulls cut from LAB at 2 inches from white CS and seashells are also from LAB and cut from tan CS at 1 inch and chalked with shades of brown and pinks.

The title was cut from blue and white CS from DCWV at 1.5 inches from LYRICAL LETTERS and welded in Design Studio.


Sun is a simple circle in yellow CS from GEORGE AND BASIC SHAPES and placed a bit off the page.  The cattails are a Jolee sticker I had hanging around in a sticker box.

The picture "frame" is also cut from LYRICAL LETTERS at 5 1/2 inches and turned on it's side, and placed on top of the picture which was matted on a piece of blue CS in matching colors.


Did you see that you can get a Project Tote Free!*

Order Today!
Just click on the Scrap'n Easel Picture below for more information! 

*Free Project Tote With Every Scrap'n Easel Order
OFFER ENDS 5/31/11

Just click on the picture of the Scrap'n Tote below for details on current sales offers from scrap'n tote, scrap'n easel and creative options project tote!

Go Fish!

Good Morning!


This is Jen from 3 Cats and a Bug/. This weeks theme at SweetSassyDiva; is the beach! My husband and I have a small place on a small lake, so our summer is filled with fishing. Ok, he fishes ~ I mostly throw a line in and then read or play on my gypsy and take pictures! The lake we fish at is, like most lakes, surrounded by cattails and has a lot of pelicans and seagulls and one small beach. When I heard the theme was beach I immediately thought seagulls and pelicans. lol My husband's birthday is coming up this week so I decided to combine both and make him a card.


For the tag I used a spellbinders die. Everything else was cut from Life is a Beach. The cattails were cut @ 2 and 3, the pelican was cut @ 3 and the water was cut @ .75. I just used the inside of the water cut. I also only used a tiny bit of crystal stickles.


Thanks for looking!


Did you see that you can get a Project Tote Free!*

Order Today!
Just click on the Scrap'n Easel Picture below for more information! 

*Free Project Tote With Every Scrap'n Easel Order
OFFER ENDS 5/31/11

Just click on the picture of the Scrap'n Tote below for details on current sales offers from scrap'n tote, scrap'n easel and creative options project tote!

May 27, 2011

Beach!

This beach page has it all!  Here the whole 12 x 12 is...


The title, which was cut from the Life's a Beach cartridge; 3 times.  Once in blue, once in grey, and once in orange.  If the image doesn't have layers, you can make your own with a pair of sharp scissors!


A close-up of the shovel and pail, again make your own layers, as well as some details of the patterned paper. (by Cosmo Cricket - Salt Air collection)


Even a cute little mermaid to journal by...


The recipe for this project is as follows:


Supplies:     Life's a Beach Cricut Cartridge


12 x 12 patterned paper - Cosmo Cricket, Salt Air Collection.  1 sheet for the background as well as another patterned paper for the strips at the bottom and journaling tag.


12 x 12 DCWV brights stack solid colors, Grey, Red, Teal, Orange, Blue, Yellow


Cuttlebug with Birds and Swirls Folder


Hole punch


Sharp Scissors


Adhesive of choice; I used ATG gun and Zig 2 Way Pen...


Method:  I cut multiple layers of the title in grey, glue and orange; then cut them apart to make the layers for the pelican.  I cut the pieces using my Gypsy at 6.81 inches by 3.50 inches.  If you don't have a Gypsy, use 3 1/2" on your Expression for height.  Cut the pelican's feet and beak off of the orange cardstock add to the grey pelican.  Punch the eye out of the pelican using a small hole punch.   Cover the blue pelican with your now layered pelican and glue together to make your title.


Cut the beach ball and its layer at 2 1/4".  Cut two; one grey and one red.  Layer.


Cut the pail and shovel at 2 1/4".  Cut two: one grey and one teal.  Cut apart the teal bucket handle and water inside using small, sharp scissors.  Layer.


Cut a photo mat to 6 1/4" by 4 1/4" for a 6x4 photo.  Using the Cuttlebug; emboss the yellow mat with the Birds and Swirls folder.


Arrange all the pieces and enjoy your summer-y beach layout.


Happy Crafting!


Did you see that you can get a Project Tote Free!*

Order Today!
Just click on the Scrap'n Easel Picture below for more information! 

*Free Project Tote With Every Scrap'n Easel Order
OFFER ENDS 5/31/11

Just click on the picture of the Scrap'n Tote below for details on current sales offers from scrap'n tote, scrap'n easel and creative options project tote!

May 26, 2011

Take Time to Relax!

Hi Everyone! This is Kim from Ricketts Cricuts! Here is a beach themed easel card (my current fave card style)!  Summer vacation is right around the corner. I can't wait for summer and days where I can take my dogs to the beach. Here is my easel card:
Card recipe:
Pink cardstock from Joanns
blue water pattern paper from Sizzix
sandy light brown paper from Sizzix
Surfer Anya Greeting Farm stamp
Colored in with Copic Markers
Scalloped circle spellbinders
Tag EK Success punch
Green pearls for bling
white gel pen
Pink By Design Sentiments

Hope you have time to relax and catch a wave this summer :)

Did you see that you can get a Project Tote Free!*

Order Today!
Just click on the Scrap'n Easel Picture below for more information! 

*Free Project Tote With Every Scrap'n Easel Order
OFFER ENDS 5/31/11

Just click on the picture of the Scrap'n Tote below for details on current sales offers from scrap'n tote, scrap'n easel and creative options project tote!

May 25, 2011

Fun in the Sun!

So My AMAZING news is that I have been accepted as a Design Team member with SweetSassyDiva!!!!!!!!!!! That is sooooo exciting for me!!!
Here is the card I made for the Design Team submission.

I used Life's a Beach, Doodlecharms, a 2 1/2 in scallop punch, and a water edge punch. Bazzil and Patterned Paper completed the card. I inked every edge and used my gel pen to accent the different cuts.

The sun is cut at 2 1/2 in.
The drink is cut at 3 1/2 in.

Keep your eye of for more submissions for this super awesome Design Team. I am sure all the posts will be amazing and inspiring!!!!!!!!!!!!!!!

May 24, 2011

Beach Party!

Hell everyone!  This is Liza from Hoo's Crafty.   I can't tell you how excited I am to be apart of the SweetSassyDiva Design Team.  Thank you so much Bobbi Jo for this opportunity.


Our first assignment was a project with the beach theme.   I decided to begin working on my son's invites for his party.  Although we are not near sand, we do plan on having a beach party at my parent's pool this summer.


I decided to make an easel card for his invites.  I think the kids will love how they are interactive.


I assembled a basic 5.5" easel card
For the front, I used Core'dinations cardstock and my Core'dinations sander to rough up that paper
The sandcastle is cut from Create A Critter {4.75"} and all its layers
I used Studio G brown ink spot to ink around the castle for dimension
The shell is also cut from Create A Critter {1.5"} and inked
Banner is cut from Twinkle Toes {2"} inked and stamped with a Studio G sentiment
I added bakers twine {The Twinery} as the flag pole and on the banner {used hand punch for the holes}
The sun was cut from Simply Charmed {2"} and inked with Studio G chalks in yellow


I love the dimension that inking can give a project.
I also used 3D foam dots on the castle, banner and shell.


Here is the card opened up


Tim Holtz distress ink was used around the front  and inside mat of this invite.
Half way down the inside I began the placement of my "card stopper" to hold up the front of the card.


I used my Fiskars scallop punch in a variety of blue colors to act as waves.
I used a sentiment from K&Co {Amy Butler} set


Below the waves I will either write in or type up all the party details.


Thank you so much for stopping by, feel free to visit me on Hoo's Crafty for more projects.


May 23, 2011

Beach!

I received the Best news ever a few days ago.  I was invited to be a Part of the SweetSassyDiva Design Team!!!  I cannot begin to tell you how happy this makes me.  Although I have been scrapbooking for over 12 years, I have never been on any Design Team, until recently.  This will make design Team # 3 for me.  So I am super excited.  I have to say Thank You to Bobbi Jo, for this wonderful opportunity!  I know that I will learn so much from all the talented ladies on this DT.  Well let's get this started.  For our first DT project, we were asked to create a "Beach" Theme project.  So this is what I came up with I will list all the supplies I used below.
So there you have it.  I'm kind of proud of this one Layout, simply because I created it under 30 minutes!.  Guess I do work better under pressure.... So here is a list of all the supplies I used in this Layout.

Material used:
gold paint dabber
color core card stock for the back ground
random shells from walmart
pattern paper and strips are from Me & My Big Ideas Low Tide collection
stickers from Me & My Big Ideas Soft Spoken Low Tide Collection
Chipboard stickers from Me & My Big Ideas Low Tide embellishments collection
Charms from Boxer Scrapbook Production- Sun and Sand Charm Mix
Sheer flowers are from Modern Romance Seashell Petals
Signo White gel pen for journaling
Martha Stewart Score Board for score lines on black card stock
Tim Holtz Ticket Die
one curtain ring to hang and display on my wall.
- Patti

May 22, 2011

Reflect!

First let me thank Bobbi Jo for selecting me to be a part of her Design Team. I am looking forward to sharing with all of you.  For the Design Team Call, we were asked to do a Beach themed project.
I live and grew up in a beach town in California so we spend a great deal of time at the beach. I selected the DCVW Linen Closet paper and cardstock from Joann's to get the muted blues and whites.

Closeups


I used A Child's Year for the little girl and umbrella cuts and shadows You will
find them on page 43 and I cut them at 4 inches. The shells, title and sand
dollars were cut from Life is A Beach. The Title words Reflect were cut at 2.92,
the shell border cut at 1.90, are from page 67. The sand dollars cut at 1.35 are
from page 66. I chalked the edges of the ACY cuts and the title. Thank you for
your comments and please let me know if you have any questions. Here is the link to the Gypsy file   Reflect
Beach LO 

May 21, 2011

Day at the Beach!

I felt a bond with SweetSassyDiva a while ago on facebook as we are both working hard at losing weight.  We have been passing back and forth praise and support!  I have been a follower of her blog for a while now and when she announced a Design Team Call I thought it sounded like a lot of fun.  I wanted to make sure I had enough time to dedicate to her blog, so I kind of waited until the last possible minute to decide.....and I am so glad I did!!!  I am super excited to be on her Design Team!!!  Here is my Day at the Beach Layout and how I created it.
Usually I start every layout with the pictures, but every now and then I do it backwards!  For this one I started with the paper!!
I used my Creative Memories wavy cutter to trim my blue paper into waves. I adhered the larger wave onto the sand colored cardstock (on the bottom) and pop-dotted the shorter wave on top of it. I tore my blue cardstock for the sky, inked it with Vintage Photo ink and adhered it to the top of the sand colored cardstock for my sky.
On my Gypsy, I opened up a new project with a 12x24 mat.  From Life is a Beach, I put two beach chairs (3.32w x 3.00h) on my screen.  I flipped one of the chairs sideways so they are leaning towards each other.  I put a beach umbrella on the screen and sized it to 4.29w x 4.29h.  I grabbed the sun from Just Because Cards and sized it to 3.13w x 6.85h.  I grabbed the water duckie tube toy from H2O and sized it and the layer piece at 2.67w x 1.92h.  I used Cherry Limeade for my font and put the words DAY and BEACH  at 2" height on my mat.  I welded "at" on top of "the" (both at 1" height) and then sized a cloud from Create A Critter to 3.09w x 3.27h to fit the "at the" on it.
My favorite part was welding the sand castle border from Life is a Beach to make a border. I opened up Layer 2 and put 2 borders on my mat at 1" height. I used my Y axis to line them up and welded them together. Then I changed the width to 12" for a true 12" border. I started my border at 1" and ended it at 13" on my 12x24 mat, then cut out two.
I glued down the sand castle borders just above the waves.
 On Layer 3, I copied and pasted the umbrella two times because this cart does not include layers.  I hid the inner cuts on one of the umbrellas and cut it out in silver paper.  I trimmed off the pole of one of the other umbrella that I cut out in the star paper.  I used purple stickles to outline the seams on the umbrella.
On Layer 4, I copied and pasted two suns, the duckie pieces, the chairs and the cloud. I also put a circle on my mat at 1.26w x 1.21h for the inner circle of the sun. I cut out the sun pieces and the layer of the duckie in yellow and the rest in white. I inked the sun pieces and the chairs in Vintage Photo, and the cloud in light blue. I assembled the pieces of the sun and duckie. I set the chairs and umbrellas on my page to make sure I had enough room for my 4x4 photo.
On Layer 5, I copied and pasted the title which I cut out of dark brown cardstock. I used the same cardstock to mat my photos.  I used the negative piece as a guide to glue down my title perfectly straight.
I glued the "at the" onto the cloud.
 I put the duckie in the water off the page and trimmed him up. 
I glued down one of the sun pieces and then pop dotted the other sun piece with the circle on it. 
I made a towel out of some red ribbon and I glued it over one of the chairs.  I glued down the chairs and umbrella.  I pop-dotted the chair on the right so it looked like the umbrella was further back.
I added some baker's twine on the photos.  I also added some Jolee's sea shell/gem embellishments on one corner of each photo and along the sand castles.
In order to fit my photos in the layout, I trimmed two of them to 4x4.  These photos were from our vacation last summer in the Ozarks.
And here is my "Beach" project, a 2-page layout that is almost as cute as the boys in the photos!!!
Thanks again SweetSassyDiva!!!  I am so excited (did I say that already?) to be on your design team!!